Download this premium 3-in-1 collage art activity pack, perfect for early childhood development and fine motor practice. This digital PDF contains three high-quality outline templates: a flower, a rainbow, and a butterfly, specifically designed for paper collage crafting.
An ideal resource for parents and teachers looking for screen-free activities, this bundle encourages children to master gluing, cutting, and color sorting. Kids can use cardstock squares, tissue paper, or magazine scraps to create a unique mosaic collage. Download the pack today to bring a burst of color and creativity into your lesson plans!
What You Need (Supply List)
To get started on these beautiful collage projects, gather these simple crafting supplies:
- Our Printable PDF Templates: Includes the blank templates for the Flower , Rainbow, and Butterfly.
- Vibrant Paper Pieces: Pre-cut or torn squares of construction paper, cardstock, or tissue paper in a variety of bright colors.
- Cotton Balls: For creating soft, fluffy 3D clouds (as seen in the flower and rainbow examples).
- School Glue: A classic liquid glue bottle or standard glue sticks.
- Child-Safe Scissors: For kids practicing their cutting skills.
- Markers or Crayons: Optional, for adding extra background details!
How to Do It: Step-by-Step Instructions
Follow these simple steps to help your little ones create their own textured mosaic masterpieces:
Step 1: Choose and Print Your Template
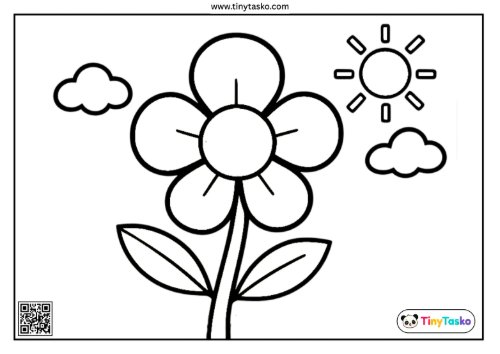
Select one of the three high-quality blank templates from the PDF pack—the Flower , Rainbow , or Butterfly —and print it out on sturdy paper or cardstock.

Click here to get the FREE PDF template: Download ( Printable )
Step 2: Prep the Collage Material
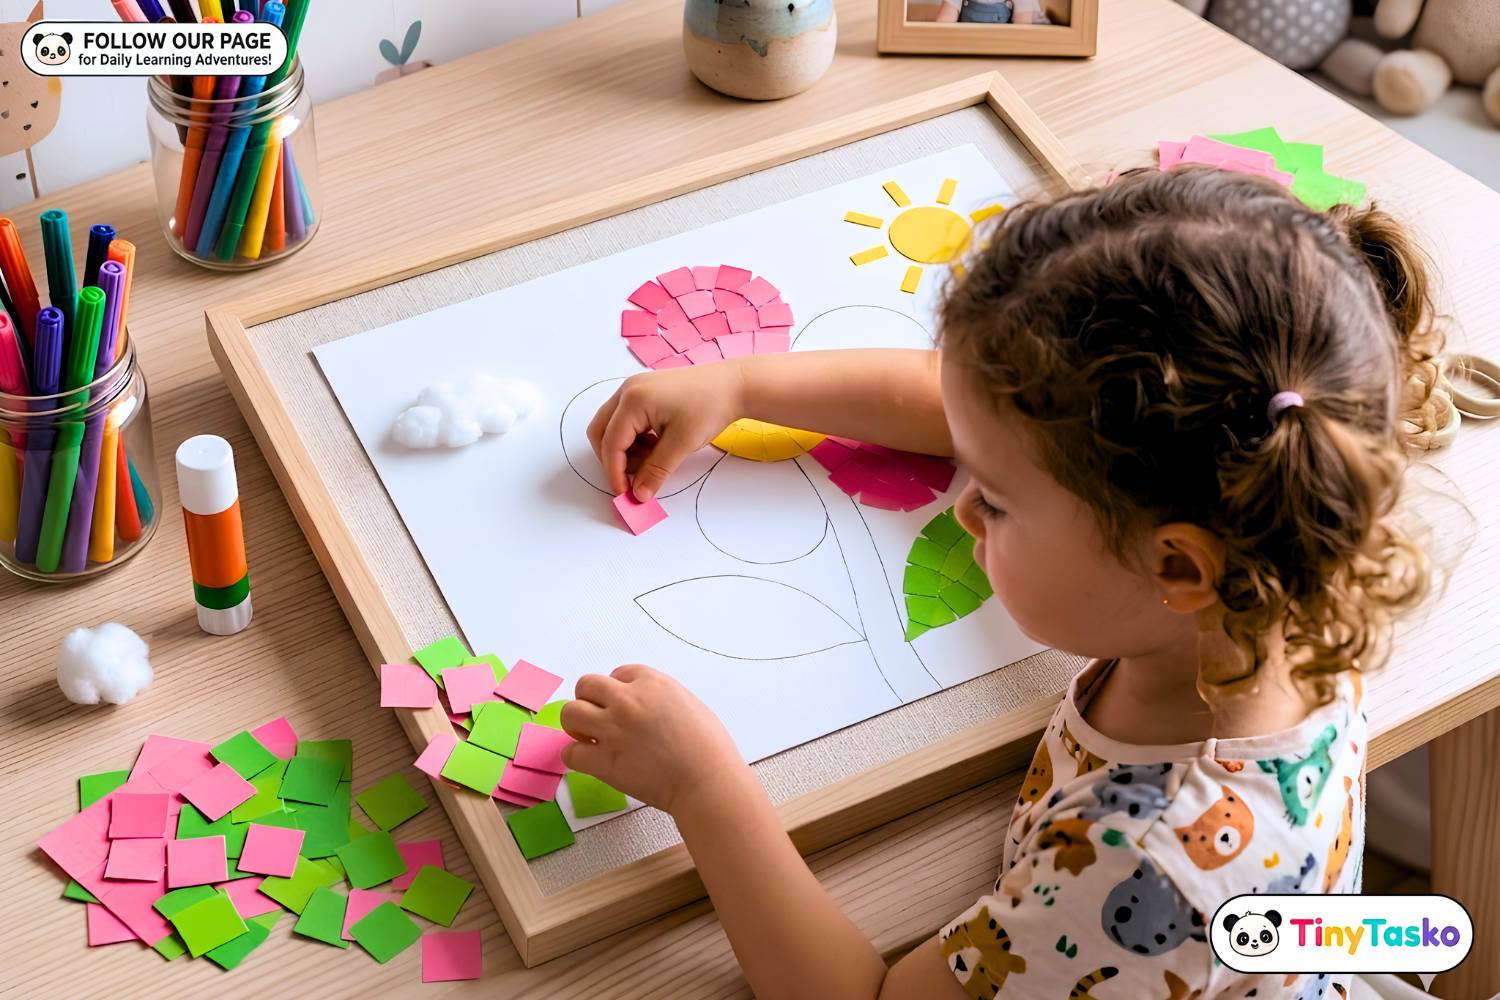
Have your children pick out their favorite colors. Encourage them to use child-safe scissors to snip the paper into small squares, or let them tear the paper by hand. Tearing paper is an incredible workout for developing those tiny hand muscles!
Step 3: Color Sort and Plan
Before gluing, have the children sort their paper squares by color. This is a fantastic opportunity to practice color recognition and map out where each color will go on their chosen design.
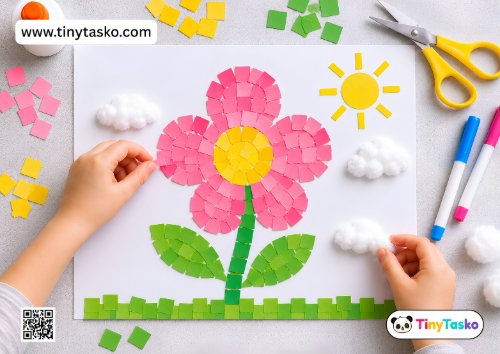
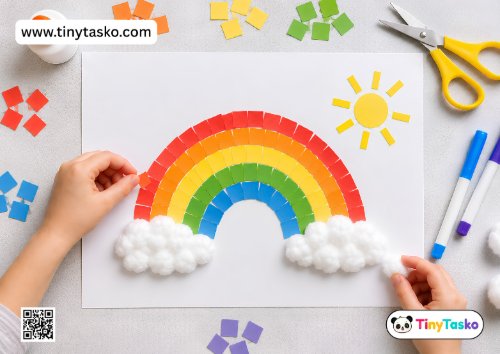
Step 4: Paste the Mosaic Pieces
Apply a small amount of glue to a section of the template. Slowly place the colored paper squares side-by-side inside the lines, creating a beautiful mosaic texture.
- For the Flower (1_2.jpg): Use pink for the petals, yellow for the center, and green for the stem and leaves.
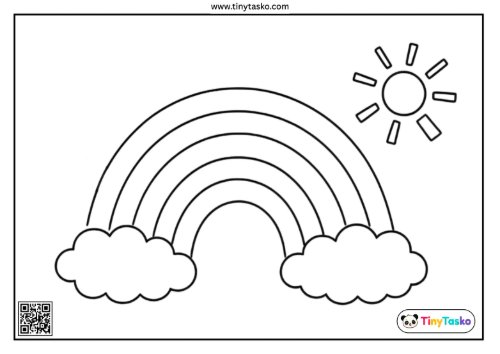
- For the Rainbow (3.jpg): Layer the colors in rows to form a classic, bright arch.
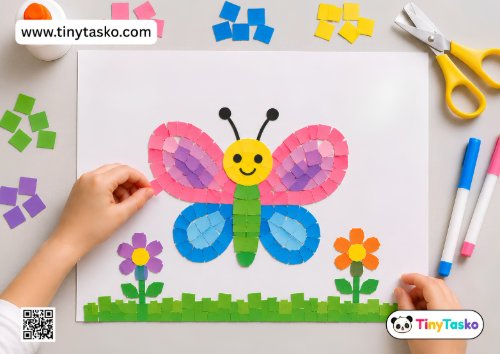
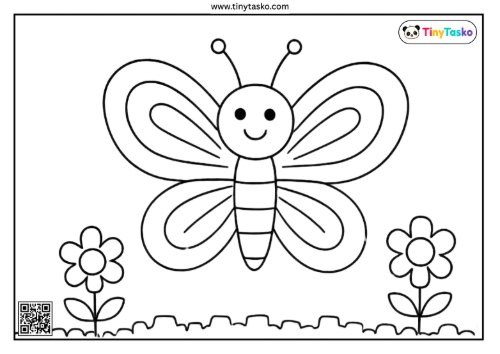
- For the Butterfly (5.jpg): Create symmetrical patterns on the wings with shades of pink, purple, and blue.
Step 5: Add Fun 3D Textures
To bring the artwork to life, add a dab of glue to the cloud sections on the flower or rainbow templates and press down real cotton balls. This gives the finished project a beautiful, tactile contrast.
Step 6: Display Your Masterpiece!
Let the glue dry completely. Once dry, your child’s vibrant collage is ready to be proudly displayed on the refrigerator, a classroom bulletin board, or framed as a seasonal keepsake!
Click here to get the FREE PDF template: Download ( Printable )
Leave a Reply